Showing posts with label fahrrad/cycling. Show all posts

30 January 2014

Sky-borne urban transport: introducing the FlyWay and the FlyPod

In a blog-post about one year ago I wrote about how ridiculously expensive it is to build underground transport in existing high-density cities and how much better it would be to transport people and things in the airspace over existing streets and other free space. I also wrote that elevated railways (including monorails) and elevated roadways are unacceptable in people-friendly dense cities, because they create too much noise and remove precious daylight from the streets below.
I have also discussed that hovering, flying, or floating in the air are all impractical for urban transit vehicles, so we have to find some kind of support structure to hold unto, but which takes up as little airspace as possible. Obviously, the smaller and lighter that structure is, the smaller and lighter all the vehicles have to be. This brings us to the question: how light can people-transportation vehicles possibly be? Here are some numbers:
  • Bicycle: 10 to 15 kg
  • Velomobile (fully faired, recumbent bicycle): 30 kg
  • Motor Scooter (electric or combustion engine): 50 to 200 kg
  • SegWay: ca. 50 kg
  • Renault Twizy (faired two-seater, electric): 450 kg
  • Mercedes Smart (two-seater): 730 kg
  • ULTra PRT vehicles (Heathrow Aiport, 4 seats): 850 kg
  • SUV car: up to 2000 kg and more
As you can see, light vehicles like bicycles can transport up to ten times there own weight, while the heaviest ones often transport less than even a tenth of their own weight (because the usual load is much less than the permitted maximal payload).

Thinking of transit you'll probably think of large buses and train cars which weigh several tons a piece. Those will obviously be too heavy for a light-weight approach. But don't worry about getting enough transport capacity in our system: instead of big vehicles with big gaps in-between them, we'll just have to make sure that our small vehicles can draw really close and even form emergent trains without any coordination.

Using this idea we can design a vehicle, our FlyPod, to transport people together only if they really want to travel together, not (unlike buses or trains) if they just happen to travel in the same direction. The minimal payload would then be just one person with clothing and keys while other luggage could already be transported in a separate, trailing, vehicle. However, there is lots of convenience associated with having your luggage with yourself and furthermore, if the vehicle has enough space and the seating flexibility, this space could be used for either a second passenger or for some luggage! Taking this into account our design payload would be 200 to 300 kg depending on the country of usage. (People sizes and weights vary quite a bit in the different regions of the world.) The empty weight of the vehicle would then be between 50 and 150 kg depending on other factors of the design. 

Note particularly that the resulting overall loaded weight is much less than that of typical areal lift vehicles (gondolas) which usually transport between 4 to 20 people per vehicle. And there we have the solution to our problem: just hang the vehicles on cables! Cables are so slim that they are almost invisible and small pedal-powered or electric vehicles running on those cables with less than 50 km/h will not make much noise. Supports will have to be spaced closer than for areal lifts (because vehicle density is higher), and they will have to be a bit sturdier than those built for streetcar overhead-wires, but otherwise they can be customized and integrated into the urban landscape adapting to whatever style is already present. And that's the FlyWay on which our FlyPods will travel!

FlyPods bring cycling to a whole new level

I have to admit that I personally prefer the pedal-powered variant because I love bicycling myself. It actually has so many advantages compared to a regular bicycle that it becomes a whole new experience. The best thing for me is that a passenger does not need to stop at red lights and crossings, you don't even need to look out for traffic! You could be reading on your phone, playing on your tablet or just gazing out the window for the whole trip! Totally like in a taxi except that you have to pedal a bit. And the pedaling will be easier, too, since most of an ordinary urban cyclists power is used for accelerating themselves after a stop. But if you don't stop, you also never waste energy for braking and speeding up again! Also, even though the vehicle is a bit bigger than a normal bicycle the recumbent position and the fairing make for a very aerodynamic shape which doesn't need much more power than a bicycle to get moving. In fact, vehicle weight only matters when accelerating and we just need to do that one single time per trip. (And there's help for that too, as we'll see later.) The next advantage is that you are protected from rain and wind and even excess heat, since a simple yet effective cooling system could be powered by solar panels on the vehicle roof. (The sun creates the heat, so it's always available when we need energy for cooling!) Fleet management of the FlyPods is very similar to how public bicycles (like Paris' famous Velib and numerous others around the world) are managed except that empty FlyPods can be moved around in little trains along the wires itself without taking up any extra road space for maintenance vehicles. If a station has surplus empty vehicles which need to go somewhere else, these can even be just pushed onto the main FlyWay and then pushed around by other vehicles, but this leads us to the next exciting topic: emergent trains and smooth merging.

Emergent trains are very simple to explain: since we are dealing with slow vehicles that have no obstacles on their way except other vehicles of the same sort (which in turn have no obstacles in their way...), a train simply forms by a faster vehicle bumping into a slower one! This bump is cushioned of by springs in the vehicle ends which contract as the vehicles approach and slowly expand again as the front vehicle gets pushed and the rear one consequentially slowed down. The spring also compensates for the normal small variations in pedaling power which would otherwise result in repeated bumping into each other. The nice thing about those emergent trains is that the air resistance of two closely travelling vehicles is almost the same as for a single one. In other words, not only the front vehicle profits by being pushed, but the follower also profits because they now have less resistance to overcome.

Smooth merging is also simple and it is necessary to keep vehicles from stopping at intersections. But, of course, there won't be shared intersections in the usual sense. Instead, crossing FlyWays will be on different heights such that vehicles just pass above and below each other. Just like on grade-free highway crossings turning onto another FlyWay means merging out onto a ramp and then into the other main FlyWay. Therefore, the only traffic conflict possible in this system is two vehicles merging into one lane. And this is accomplished by an automatism which uses the kinetic energy of the vehicle which enters the merging zone last to speed up the vehicle which is ahead. The second vehicle will thereby lose speed such that the first one will clear the merging point safely ahead. Note that if the vehicle being slowed down is a train, then all the vehicles behind it will also be slowed down, while the vehicle being sped up is always pulled away from the train so that the other vehicle can sneak in. If two trains meet this results in vehicles being sped up from the front of the trains in alternation while the tails of the trains get slowed down more and more.

Flying Bicycles, so what?

Of course, this great invention of mine is not going to appear in reality very soon. I found one project, called Shweep, which is very similar to what I described here (they use a very narrow metal rail instead of the cable) and which itself is still in the research stages, especially for the switching technology: how to merge in and out of lanes. I admit that my description is very fuzzy in this regard and while the rest of the system is pretty low-tech and could have been build 50 or 100 years ago, the best solution for switching might actually use quite a bit of high-tech.

While doing research into this topic I found a lot of information about "Personal Rapid Transit" (PRT) systems, a combination of mass transit and private vehicles (basically a transit system that never requires transfers and always takes you from your starting station directly to the destination station). Despite much research this never took off big and the above-mentioned ULTra system at Heathrow airport is probably the example which handles the most traffic. ULTra with its vehicles driving on normal asphalt also shows that PRT now becomes less like rail-based systems and more like ordinary cars. To me, it actually seems quite likely that self-driving cars will popularize enabling driverless taxis and thereby fulfill all of PRTs promises plus picking people up at their door without the need of any stations at all! Isn't it fun to think that SciFi also imagined flying cars which were driven by people, but now in reality we seem to be getting the boring old combustion-powered asphalt-rolling cars, but they will drive themselves?! (I know that burning fuel to drive might get out of fashion soon with electric cars, but that's not a point I want to argue here. Besides: (1) electric traction (in street-cars) was commonplace in big cities many years before cars arrived at the scene, so it's not really a new technology, and (2) there are ways to produce engine fuel from other than crude oil, so maybe combustion engines will stay with us for longer than it seems now. See XtL (sorry German), English: CtL, BtL.)

Driverless cabs might make commutes much more relaxed and save a little space on crowed streets (for example, by separating the car into two compartments and taking two passengers on the same ride, or by taking a full four or more, for a cheaper rate than a bus and still end-to-end, with a minimal detour to drop off or pick up others), but they will not make obsolete the need to create higher capacity for transport in general as in new subway construction. The FlyWay, on the other hand, can take between 10% and 30% of inner city traffic which in itself might be just enough to considerably reduce congestion on the streets as well as in subways and buses. So the FlyWay isn't just a very relaxed, comfortable, and quick way to travel for those who use it, but it's also a great service to everybody else on the road.


5 May 2012

Shimano Nexus/Alfine Inter-8 hub gear disassembled / reverse-engineered

On a beautiful day in 2011, when I visited my favorite Berlin bike builder and dealer on the Schöneberg Island, I noticed that he used the shell of a Shimano Inter-8 gear hub as an ash tray. When I asked him about the piece, he told me that one of his customers or friends had serviced the gear hub and not reassembled it correctly, making the ball bearings smash when he used it again.
Left is the reduction stage, right the 4-gear stage
(including carrier shared by both stages).
I asked for the innards of the hub which Conrad still had below a shelf in a corner of the shop. He gave them to me and this week I finally got around to look at them more closely.
I already knew that this hub is logically composed of two stages of planetary gears. One has two gears, the other four. Both can be switched independently to give eight gears and the ratios of the cogs are tuned in such a way that the eight gears have roughly equal spacing and no gear overlap. (So logically they work like the 3×8 gears of a 24 gear derailer system, only that all the gears are shiftable in sequence.) After disassembling the hub, I counted the teeth of all the cogs and used the counts to calculate the gear ratios. I was happy to find that I just got the same results that are published on several places of the Interwebs. For those who can't wait to see them, here's my calculations. All others can first read on to find out how this stuff works. Actually, those who've never read anything about planetary gears, go start with my introductory blog post on planetary gears to learn some of terminology. Then come back to find that I am experimenting with different terminology here (after all, this is a work in progress and I need to figure out what works best). For now, let's say “cog” to the little toothed round devices that turn inside the gear hub to translate speeds. Then we can use the word “gear” for the resulting ratios of speed, just as you ordinarily do when you say “first gear, second gear” and so on.

Now, here's a summary of the hub's architecture: since both stages share the same planet carrier, the carrier serves as the one and only power transfer between the two stages. The carrier is therefore output of the first stage and input of the second stage, which conveniently serves the fact that the first stage reduces speed, while the second stage increases speed. In both stages the sun cogs are locked and the ring cog serves as the other moving part. (In the second stage, there are three sun cogs locked via switchable one-way ratchets.) One-way ratchets (aka freewheels) are used in many places in the hub. Thanks to the freewheels several gears can be switched “active” at the same time which has two key advantages. One, when shifting gears, the mechanism only needs to activate or inactivate the higher gear, while the lower will automatically be inactive (freewheel) without being actuated by the shifting mechanism. The second advantage is that during shifting (or when there's a problem with the shifting cable), there is never a no-gear stage, since the lower gear will always be active as fall-back in case that the higher gear doesn't engage properly.
Reduction stage with two planet sets.
A first surprise I found when looking at the hub innards was that the reduction stage has two planet sets to create just one reduction ratio. I had previously assumed that there was only one set, that is, one sun cog, a couple of planet cogs all engaging with the sun cog, and one ring engaging with all the planets. But in reality, the three planets are two cogs in one: a smaller cog that engages the sun and a little bigger one, that engages the ring. I should actually have thought of that because with a single planet set, it is quite hard to achieve an 89% gear ratio as this stage of the hub does. (The planet cogs would need to be to tiny, since their size approaches zero as the ratio nears 100%.)
The power from the chain and cog is transferred to the ring cog of the first stage via a freewheel. To bypass the first stage (as in gears 5 to 8), a clutch connects the incoming motion directly to the planet carrier. Since the ring gear always turns faster than the carrier, it will be then freewheeling with respect to the input motion. (Inversely, when the clutch is disengaged and the ring is driven by the bike chain, then the carrier will turn with the translated speed, so it's important that the clutch is completely disengaged, since the gears would otherwise jam.) From experience during about 10'000 km riding a similar hub (and by what I've heard from others), switching this clutch is the most difficult and noticeable switch in the hub. It's the one between fourth and fifth gear. Also the one that first becomes edgy when the shifter cable is misadjusted. (Happens rarely and is easy to fix.)
Finally, let's look at the second stage which as I said is driven by the carrier and transfers its motion to the hub shell (and thus the wheel (and thus the road (and thus the earth, which makes is turn))) via the ring gear or (if in direct drive) via the carrier. Both ring and carrier connect to the hub shell via a freewheel so that the faster one will be driving while the other will be in fallback mode. Interestingly, direct gear (1 and 5) is achieved by locking none of the sun wheels which makes them turn freely, making the planets turn freely and the ring not being driven, so the carriers wins the race to drive the wheel. One last factoid: the ring cog sits on the smallest of the planet sets (with the biggest sun cog) which when locked makes the biggest gear (4 and 8). Locking the smallest sun cog, gives the smallest (non-direct) gear (2 and 6). The jump from direct drive to this gear is the biggest in the entire hub (22% compared to just 14% from gear 3 to 4). I think the reason for this is that the sun cog can't become much smaller than it already is because the ratched mechanism for locking it still needs to fit inside. (And the solid hub axle is still inside the ratched mechanism.)
I actually disassembled the hub one step further than the manual explains. I only figured this out by accident after removing one more stop ring (shown on the right in the very first picture) when suddenly the shafts holding the planets of the second stage fell out of the carrier. When I tried to make them all fall out, the shafts holding the first stage's planets also fell out from the same holes! :-D After taking out the first stage planets, the ring cog from the second stage could be removed since it was only held by the planets and then the planets from the second stage could be removed. The sun cogs are still inside the carrier. I can see and feel another stop ring inside them, but didn't try to take it out. I instead just counted the sun cogs teeth by marking one tooth and then turning the cog until the marked tooth came up again. It's really interesting how some parts are purposely held by stop rings while others (such as the second stage ring gear) are just floating on other parts (second stage planets) and held sideways by again other parts (first stage planets). I am a bit curious whether I could put that part back together again. Maybe some day... ;-)
Here's my calculations again for those who I made curious. I've already got a follow-up post in my head in which I'll explain the formula that the spreadsheet is using.

Sources:

14 April 2012

Probefahrt Tern Eclipse

Nachdem ich die Tern Falträder schon auf der letzten Eurobike bestaunt hatte (ohne viel anfassen) und seit dem immer gern wieder im Internet ihre Fotos angeschaut, war es Heute endlich so weit und ich fuhr mit der S-Bahn zu Adams Bikeshop in Lichtenrade (Süd-Berlin), um mir die Räder genauer anzuschauen. Der Laden ist ein offizieller Tern Pro Shop und hatte wirklich fast alle Räder da. Am meisten beschäftigt habe ich mich mit dem Eclipse P7i, eine kürzere Probefahrte gemacht habe ich mit dem Link P9 und alle anderen Modelle habe ich mir in Ruhe angeschaut.
Auf das Eclipse bin ich gekommen, weil ich mich in diesem Winter an eine völlig aufrechte Sitzposition gewöhnt habe und mir für nächsten Winter ein Fahrrad wünsche, die mir diese bietet, ohne dass die Lenkstange zu lang wird. Bei meinem Speedy bin ich diesen Winter so gefahren, aber die Last, die sich am unteren Ende der Stange auf das Gabelrohr überträgt, scheint mir einfach zu groß, und so traue ich mich schon gar nicht mehr scharf zu bremsen. Beim Eclipse gibt es das Problem durch den höheren Rahmen nicht und man kann deutlich sehen, dass die Lenkstange kürzer ist, und trotzdem kann man den verstellbaren Vorbau auch auf eine völlig aufrechte Sitzposition einstellen.
Lenker ganz hochgestellt und Sattel auf meine 1,86 m, sieht Eclipse fast aus wie ein "großes" Fahrrad und fährt sich auch schön aufrecht.
Im Gegensatz zu meinen geliebten 20" Falträdern (406 mm Felge) erscheint mir das Eclipse (507 mm Felge) schon fast riesig. Mit den fetten Reifen (50 mm Big Apple) erreichen die Laufräder schon fast die Höhe von 26 Zoll (559 mm) Modellen mit sehr dünnen Reifen. Das gefaltet Paket soll laut Hersteller kaum größer sein als ein gefaltetes 20" Modell, aber mir erscheint das Paket wirklich riesig. Man kann es zwar problemlos tragen, aber beim Verstauen (gerade im Auto oder Öffi) braucht es eben doch wieder etwas mehr Platz.
Kann man so prima am Sattel schieben. (Lenker kann man noch kleiner falten.)

Was mir am Eclipse gefiel:

  • größter Vorteil gegenüber den meisten Dahon-Velos ist meiner Meinung nach der verstellbare Vorbau. Er ist leichter zu bedienen als die Teleskop-Lenkstange, sieht schöner aus, und das Verstellen per Drehung auch nach vorn/hinten ist besser als nur rauf und runter! Dieses Teil allein macht schon sehr viel Komfort aus! Schade nur, dass die meisten (preisgünstigen, aber auch Mittelklasse) Tern-Modelle nur einen ganz einfachen Lenker haben, den man überhaupt nicht verstellen kann.
  • die Nexus Inter-7 Schaltung funktionierte im Test gut und schaltet auch, wenn man nicht komplett mit Treten aufhört. Da es in Lichtenrade keine Berge gibt, konnte ich die kleinen Gänge nicht realistisch testen, aber der größte Gang war hoch genug, um richtig schnell zu fahren.
  • der Gepäckträger kann gleichzeitig normale Packtaschen an die Seiten hängen und einen Korb oder weitere Tasche (per Klickfix-System) obenauf. Außerdem gibt's natürlich noch einen Spanngummi dazu, damit auch mal eben so, was drauf festklemmen kann.
  • Falten funktioniert prima. Die Achsmuttern von Vorder- und Hinterrad liegen gefaltet leicht versetzt, so dass das Velo nicht noch breiter faltet als es eh' schon tut. Der gefaltete Lenker wird durch ein unten am Rahmen verstecktes Gummi-Gürtelchen festgehalten.
  • Den Sattel kann man viel höher stellen als bei den 20" Modellen, so dass ich auch meine Beine ausstrecken kann und trotzdem noch ca. 9 cm Reserve habe. Also sollte es führ Fahrer bis ca. 2 m Höhe reichen!
  • Das ganze Velo ist leise. Ausnahme: der komische Kabelschlauch-Kettenschutz, aber der macht auch nicht mehr Krach als ein Hebie. 
  • Steuersatz war leichtgängig (im Gegensatz zu meinem Mµ Uno!) und hatte kein Spiel.
  • und wie schon gesagt, der Rahmen erlaubt auch eine völlig aufrechte Sitzposition, ohne dass man Gabelschaftbruch fürchten muss.

Kabelkurv und -quetsch
Was mir nicht gefiel:
  • Die Beleuchtung konnte ich leider nicht testen, aber die Kabelführung fand ich echt beschissen und das Rücklicht hat nicht mal ein Kabel. Trotz Dynamo wird es irgendwann einfach aufhören zu leuchten und wird nicht wieder leuchten, bis man eine neue Batterie beschafft hat. Im gefalteten Zustand hat das vordere Lichtkabel sogar den Fauxpas begangen eine Schlaufe zu bilden, in der man beim Tragen oder herumstehen sehr leicht etwas verfangen kann und damit das Kabel abreißen...
  • Gleich weiter zu den Brems- und Schalt-Kabeln: die werden beim Falten des Lenkers fast eingeklemmt und das Brems-Kabel fährt beim Falten auch eine sehr enge Kurve. Nicht gut!
  • Typische Fabrikvelo-Montagefehler: Die vordere Bremse hat etwas geschleift (auch das Rad war nicht perfekt zentriert). Entweder der Lenker in der Gabel oder das Schutzblech war leicht schief, so dass ich immer den Eindruck hatte, irgendwas stimmt nicht. Beim Link P9 gingen die Bremsen besser, aber die Schaltung war nicht richtig eingestellt. 
  • Das Link P9 fuhr sich übrigens auch prima, aber die Falt-Pedale sind total lächerlich wackelig und scheinen billiger als die bekannten Suntours an den billigeren Modellen.

Noch ein schönes Detail:
sehr ästhetisch und anfassbar geformter Hebel der Lenkerverstellung.

Es war schon sehr interessant die beiden Velos auszprobieren und auch gut, im Laden mit den anderen Modellen zu vergleichen. Aber danach habe ich doch gemerkt, wie gut sich eigentlich mein Speedy nach sechs Jahren und 10'000 km noch fährt! Wenn ich nur weiter gut in Schuss halte, dann wird er sicher noch ein paar Tausend km mehr fahren. Direkt vor dem Laden habe ich auch Speedys Lenkvorbau wieder umgedreht und etwas tiefer gestellt, sozusagen auf Sommer zurück gestellt, so dass ich mich jetzt nicht mehr ganz so sehr um Gabelschaftrohrbruch fürchten muss, wie im Winter-Modus. Und bis zum nächsten Winter ist ja noch viel, sehr viel, Zeit!

Nachtrag: da ich ja einen Ersatz für meinen im Velowerk gebauten Speedy suche, hatte ich auch überlegt, mir den Ersatz auf Eclipse-Basis auch wieder im Velowerk bauen zu lassen. Über Nacht habe ich mal nachgedacht, ob ich es mir auch selbst bauen könnte. Also Fabrik-Eclipse reparieren/umbauen oder auf Basis eines Rahmensatzes bauen. Hier die Dinge, die ich selbst könnte:

  • Laufräder nachzentrieren oder neu bauen (mein Hobby, haha)
  • Elektrische Verkabelung und bessere Leuchten
  • Schaltung, Bremsen nachstellen. Kleinteilmontage korrigieren.
  • Bessere Faltpedale anbauen
  • Ggf. Übersetzung anpassen
  • Ggf. Gepäckträger, Sattel oder Lenker austauschen.
Zum Unterschied "Fabrikvelo umbauen" versus "ab Rahmenkit neu bauen" könnte ich jetzt auch einiges sagen. Mit James Bold (meinem immer noch unfertigen Mµ Uno) habe ich die Erfahrung ja gemacht und kann sagen: es war gut, dass das Velo auch vor dem Umbau schon fahrfertig war und ich Stück um Stück verbessern konnte. Schlecht war, dass sich für viele Komponenten der Umtausch nicht lohnte, weil mein die alten Teile übrig hat. (Beim Eclipse P7i würde ich z.B. die Inter 7 Nabe behalten, obwohl ich für ein neues Velo eine Inter 8 mit Nadellagerung verwenden würde.) Außerdem ist Mr. Bold gerade außer Betrieb weil dem Fabrik-Hinterrad Speichen brachen, was bei einem von Anfang an selbst gebauten Velo wohl nicht passieren würde.
Velowerk-Kabelbaum am speed werx.
Und hier nur die Dinge, die ich nicht alleine tun kann, die aber Thomas vom Velowerk sehr gut kann:
  • Bessere und nachschmierbare Tret- und Steuerlager; plangeschliffene Lagerflächen.
  • Der geniale Velowerk Kabelbaum. (Mit jetzt noch verbesserter Kabelführung, von der es leider noch kein Foto gibt.)
  • Hohlraumsiegel
  • Spezielle Rahmen für Hinterbauständer und andere praktische Anbauteile.
  • Überhaupt und allgemein vertrauenswürdige Komponenten,  fachgerecht verbaut. Als Amateur kann ich ja gar nicht genug Velos bauen, um einen vergleichbaren Erfahrungsschatz aufzubauen, wie ein Profi. 

16 May 2011

Chain ring aesthetics

For Knicki, my favorite recumbent bike, I want to buy a 160 mm crank because I hope it will stop make my knees hurt. (I've heard that many recumbent riders find cranks shorter than the normal 170 mm more appropriate.) As a style guide note that I already sprayed Knicki's new rims in a beautiful white:
Sprayed rims for Knicki


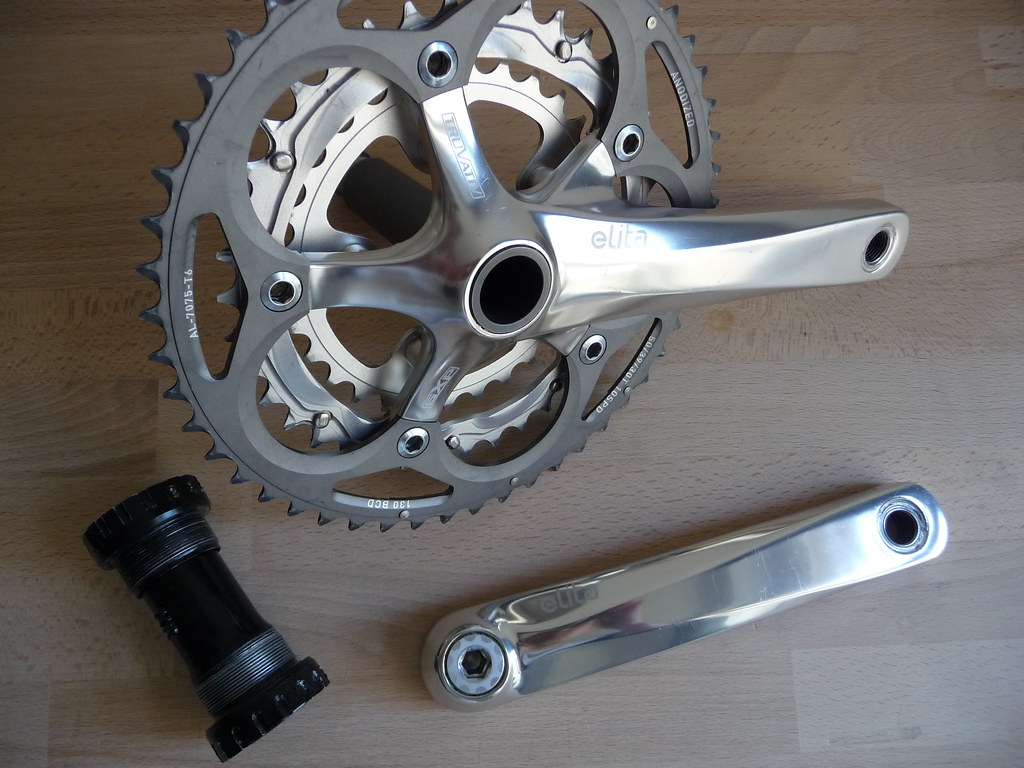
I just settled on these Sugino XD cranks:

Now I am looking for a matching 110 mm BCD chain ring with preferably 50 teeth (I also consider 48T ones). Generally I was looking for something as transparent as possible to make the bike look light and slim.

Here's a gallery of what I've found. The first one is from Spécialités T.A. and it was just made to fit the Sugino cranks:
This one's not as transparent as possible but the five surfaces would allow to spray or paint some nice white pattern on.

The next one is from Sugino themselves. The right photo shows it with some cranks and a chain guard as used by Dahon. (I will add a chainguard if the chain falls off as often as it does now.)


And there's another Sugino with flattened edges. The right photo shows how it looks on the cranks, although I will have it as a single ring of course (just didn't find a single photo).

What's really unfortunate is that they don't have it in white. I could get a non-colored one and spray it myself, but it seems hard to cover the edges so well, that the result will look clean. (When I sprayed the rims, some of the lacquer ran underneath the covering tape and left lasting squirts.)

Finally, a wacky design from Blackspire (made in Canada, as the shop says) which also leaves space for painting some small motives.
I made this blog entry so I could look at my options a few times a day and dream of them at night and then decide what to get. I also have to take into account that I have found a German dealer for the first and last ones, but not the two Sugino ones. So it also depends how much I want to go out of my way to make my ride beautiful.

27 March 2011

Jack the hub stripper

Yesterday I stripped my first hub (a Sturmey Archer 3-gear with back-pedal brake) and put the photos of the parts I found inside in a flickr set.

Let me just show you the most interesting pictures here:  

On top of the first picture are all the parts I took out from the brake side of the gear (including the main shaft which comes out on this side) and on the bottom is just the drive side bearing cone with its nuts. I named all the parts using part names I found in technical descriptions of similar gear systems. I think my names make sense, but other description you might find might use different names for the parts.

both sides opened and main shaft taken out on brake side

Note especially the main shaft on the top left, with the planet carrier and its four planet wheels (two shown) and the sun wheel, which is hidden, but can be felt when turn the planet carrier on the main shaft, because the sun makes the planets turn. Planets, sun, and ring gear are permanently engaged with each other, no matter what drive speed is chosen.
As for the changing of speeds, you can see a little piece sitting in a slot of the main shaft. This piece is pulled by the actuating cable (thus, the speed-change lever) and pushed back by the spring shown at the bottom. The little piece then moves a larger piece which on the photo is shifted leftwards on the shaft. I call it the “clutch element” and it normally sits right on top of the little piece.

The second picture shows the remaining parts, which are the most interesting, because those parts take part in switching the gears.

ring element, drive side cover, and driver taken out

The part on the left with the two big pawls is the “ring element” on its inside is the ring gear (interior toothing) of the planetary set. The pawls on the outside engage with the hub shell to drive it, but in some gears the metal ring shown above the ring element will cover the pawls, so that the wheel can be driven by another part at a different speed.
The part in the middle screws into the hub shell and has teeth with which pawls can engage (I don't yet know which pawls tho). The part on the right is the “driver” because it carries the chain sprocket and brings the drive input into the hub. It has two pairs of smaller pawls (hard to see because of the grease, here's a close-up). Depending on gear, the driver will drive the ring element, the planet carrier, or the hub shell directly. I haven't figured out the details of this yet, but I think that the “clutch element” shown in the first picture is playing an important part in it. What's making things more complicated is that the driver also needs to actuate the back-pedal brake which I think is why the pawls on the driver are bi-directional.

On the output side, the hub shell will be driven by the planet carrier, the ring element, or the driver directly. I have heard that the brake element (first picture, top middle) is part of the transmission path in some gears, which I think explains why it also has a pair of free-wheel pawls on it.

I'll post more details about all this when I have figured it out better. 

22 March 2011

a disappointment, a niche well-filled, and a dare

Prima Parte – Una Delusione

If you look at the specs SRAM's i-motion 9 gear hub, they are really impressive. Unlike Shimano's proven excellent Inter-8 hub, the gears are spaced very evenly. Unlike previous SRAM hubs, the actuation doesn't sit vulnerably outside the bicycle's frame, but is inside like the Shimano's, but still much easier to take off when changing a tire. The hub got excellent reviews in magazines and blogs (like this one on hubstripping), many bicycle makers embraced it, and the first bunch of buyers were happy. It looked like the German SRAM engineers of Schweinfurt had been able to offer a real alternative to Japanese bicycle parts domination.
However, if you look at the same product right now, there's some disappointment around. The hub really delivers on good gears and easy shifting, but reliability doesn't seem to be so good. Thinks break, hubs have to go to maintenance. Maybe the quality isn't even worse than previous SRAM hubs, like the Spectro S7, but the good performance of Shimano's products which are used in applications more demanding than what gear hubs previously experienced. Looking at the market right now, there are less manufacturers using this hub in their bikes. Biking through Berlin I see hundreds of bikes running Shimano gear hubs (especially the Inter-8 premium and Alfine 8), but I rarely see an i-motion 9 around.

I had decided to get an i-motion 9 for Knicki, because I have the inter-8 on Speedy and like to try something different. But everywhere I look for answers to some buying and fitting details, I find people telling me that I shouldn't get it and get Shimano instead. Of course, I don't know if the hub is really that bad. I requires much experience to make such a statement and I don't know who I can trust. Maybe, it's just bad marketing and bad crisis management at SRAM, while the product is not that bad. But frankly, for my bike I want something desirable and the i-motion isn't desireble to me any more.

Seconda Parte – Una Nicchia ben Riempita

sdfasdf While researching gear options for Knicki I also found Sturmey Archer's new X-RF8 hub. I could write a half-novel now about SA's history and how Sunrace of Taiwan saved this company with very long tradition (or at least some of their heritage). And I could as well talk about the strong parallels in SA's and F&S' history. Fichtel & Sachs (gear hub makers now part of SRAM) and Sturmey Archer both started producing three-speed hubs at the beginning of the 20th century and I am still not quite sure who of the two did actually invent the thing. But to cut a long story short, I want to talk directly about the very interesting business strategy of Sunrace in dealing with SA. The smart thing they did is not to face their competitors directly with similar products but fill market needs that are unsatisfied by the competition. Of course, a large part of their business is selling slightly improved versions of their traditional three-speed hubs to bicycle makers who have bought them for a long time and are still fitting them on (some of) their current models. But another part is the market for fun-bikes and fixes which they provided with a fixed-wheel gear-hub (that is, there is not free-wheel in any gear) and with a gear-hub that shifts by back-pedaling, thus without any cable or switch disturbing the clean looks of one of those “pure” single-speed bikes.
Another big market for SA is folding bikes. Many of their gear hubs are narrower than those of the competition. For example, the five-gear hub fits the Brompton frame without modification. (Even the 8-gear fits the Brompton, albeit with some widening of the frame.) SA also makes a hub which specifically combines with the Brompton's two-sprocket derailler to create a system of six evenly spaced gears. The principle is similar to SRAM Dual Drive and Shimano Intego, but the market is specialized and the product is the only one that not just dispenses with overlapping gears (dual drive 27-gear is just 13 or 15 “net” gears), but it also results in evenly spaced gears. It's been a close cooperation with Brompton Bicycles and it's called “Brompton Wide Gear” (BWR).
But it's SA's 8 gear hub, with the poetic name “X-RF8” (rear freewheel, as opposed to the RD8 with integrated drum brake) that I find particularly fascinating. It is not just constructed narrowly to fit smaller bikes. It also has the gear arrangement designed for smaller wheels. I find that particularly interesting, because I had previously wished that such a hub would exist. A bike with small wheels always needs a larger chain wheel or smaller sprockets to get the same development (distance traveled per crank-turn). The Shimano Inter-8 which I have in Speedy has its neutral gear (that is the gear in which the gear hub behaves like a non-gear hub) in position 5. I thought that if it was in position 4 instead, then the entire gear range would have a larger development and thus work with a larger sprocket than the current, tiny, and rare 14 teeth I am using now. And it is just this idea which engineers at Sunrace have take to their hearts and used to design into the hub. The result is a system where the smallest gear (first gear) is the neutral one and the other seven gears all are longer than neutral. This means that even with small wheels, a bicycle can use standard sizes for chain wheels and sprockets and yield a good development. Smaller chain wheels mean prettier bikes and more possibilities to mount chain guards. Larger sprockets mean less wear and tear. Sturmey Archer being the only company that's building such a hub means they'll have a lot of happy customers. That is, in theory at least. I find it disappointing that I don't know any folding bike manufacturer who's actually offering series models with the X-RF8. A quick googling only shows some custom-tuned Bromptons. Well, Sturmey, I wish you more success in the future with this great idea.

Terza Parte – Una Scommessa

Now that I am doubting to buy the i-motion 9 hub (and not wanting to buy something exotic as the X-RF8), I am almost back to square one again. For sure, I could just get another Shimano Inter-8, which would also be a different one than Speedy's because the product has since been upgraded with the “silent” roller clutches. But I really want to try something different and I especially want to try a hub with more evenly spaced gears so I can feel the difference to the Inter-8's very oddly spaced gears (14 to 22% for the different shifts).
So now, 2011, it's also the first season that Shimano's Alfine 11 is on the market. A device that on paper looks just as good as the i-motion 9 and better. And it comes from the market leader in sporty gear hubs. But does that mean it's gonna be really good? For one thing, it has its neutral gear in position 5 of 11 which means that it is also much easier to fit onto a twenty-incher (such as Knicki), which solves a problem that I had with the i-motion 9. On the other hand, I'd really like to build a wheel that's gonna last and create a bike that also has a good resale value when our relationship ends one day. I'd really like to wait just one more year to see how the new hub does in practice. But Knicki desperatly needs a revamp!
How will things work out for us? Read it on this blog. Sooner or later.

(PS: subscribe to the RSS to get notified of new posts.)

6 March 2011

Another Spring, another Speedy-Tuneup

This year I did it earlier than usual, because my yellow darling had a flat rear tire and taking the rear wheel out is so much work that I used the occasion to also replace the chain and clean the gear actuation on the hub with much affection.

I had learned from past experience that taking the chainglider off and back on will bring dirt on the chain, so I did everything with much care this time. I spent a lot of time on everything, but I think that's perfectly ok to do once per year. For this year, I want to protect Speedy better from rain. I didn't get a basement to rent in my building, but I have a nice bicycle cover for outside or could take him up in my room with the other two bicycles.

I had felt that the chain had suffered a lot in this year's rain. Standing outside day and night is much worse than occasionally riding through rain and having a dry place to sleep. I thought that the sprocket might also need to be replaced, since last time changing the chain, the new one wouldn't fit on the old sprocket. But in fact, I measured the chain and it was just worn out, not totally over worn-out and the sprocket looked just a little worn. In any case I was thinking of getting a larger sprocket to vary my gears a little bit, but because of the flat-emergency I didn't have time to purchase one. (Special-size sprockets are rare!) I guess I'll do the sprocket-varying next year.

I am quite satisfied how the clean-up went. I am only doing it once a year or even less often, and last year at Thomas' shop in Schaffhausen, I didn't pay attention to everything he was doing, but I still remembered the steps well (or at least figured them out). For the rear wheel, the brake cable and torque arm need to come off, then the chainglider (at least the rear part), then the shifting cable, then the wheel comes out, then I can take apart the gear actuation to clean it. When putting things back together I thought of using the tuning-marking to adjust the shifting cable really well. I also thought of giving some slack in the cable housing so it doesn't un-adjust when the rear wheel is moved a bit to tension the chain (as had happened just two weeks ago). I just thought about it after doing the adjusting, so I had to do it again.

Reminder for myself: when I cleaned the gear actuation I found that the dust cover of the hub had a little crack. I need to get a new one, so I can put it on next time I change the chain. Shimano part Y-34R 98110. I also need to find out which tool is needed to take off the sprocket since I never did this myself.

my new bicycle commute to work


Größere Kartenansicht

It's a wonderful 30 mins every morning and night, using mostly quite streets with little traffic and a great choice of restaurants on my way home :-)

I'll post some pictures one day when I am taking the road and not hurrying to work.

16 January 2011

Planet of the gears, part one

Fascinated by bicycle hub gears and the vision that this type of gears not only works as part of the hub, but also as part of the chainwheel (for example), I have started to study the subject more deeply. Wikipedia doesn't offer much on the subject. Amazon Germany had a book devoted to epicyclic gears (also known as planetary gears), but it covered mostly aspects that I don't need to understand bicycle gears. Finally I discovered some patents on the subject (all available for free online!) and as I am learning more and more about the subject, I will explain it here in simple terms and with close relation to cycling practice. So here's the first part of what I hope to become a comprehensive and exciting series: the planet of the gears.

In this first part I want to deal with one simple question: what is the transmission ratio of the simplest planetary gear set used in bicycles? The entire complexity of planetary gears (and we'll get to pretty complex arrangements in later posts) can be derived from two formulas which I'll show you after explaining the general setting and the terminology (which I call nomenclatura because I like that word). First of all, I follow the literature by reserving the word “gear” for the cog wheels, that is, physical parts of the gear system. The different settings for transmission ratios which in ordinary English are called first gear, second gear, and so on, will be called first speed, second speed, and so on, so we don't confuse them with the parts of our gearbox.

Now, to the Input and Output parts of a simple planetary gear system. There are three shafts which can be used to transmit a force: the sun gear s, the ring gear r, and the carrier c of the planet gears. If all three are used, the gearing adds two inputs to generate an output or vice versa. To use the gearing as a transmission to translate rotational velocities, one of the three possible shafts will be fixed. If we'd fix the planet carrier, then the planets wouldn't revolve around the sun any more and we had a pretty boring non-planetary transmission. There might be reasons to do this in a practical setting (because it could yield an additional speed), but for the calculation of planetary transmission ratios, we do not need to consider it. We'll either fix the ring gear or the sun gear.

Nomenclatura: Big letters S, P, R denote the number of teeth of the sun gear, planet gears, and ring gear respectively. (The planet carrier itself does not have any teeth.)
Small letters s, c, p, r denote the rotational velocities of those gears and the carrier.

Formula of stationary gears: For two spur gears (that is plain, ordinary cog wheels) with teeth numbers Y and Z and rotational velocities y and z which are engaged, the ratio of rotational speeds is the inverse of the ratio of number of teeth, that is, y/z = Z/Y, or y×Y = z×Z. If one of the gears is a ring gear, a minus has to be thrown into the formula like that: -r×R = z×Z.

Stationary transmission ratio: The weird thing about planetary gears is that gears are not just turning around their shafts but the shafts themselves are moving in space. In order to calculate the transmission ratios of planetary gears, we will first assume that those little planets are not actually moving. We will imagine that we –as the observer– are sitting on the planet carrier and from our relative position the planets do not move (but they still rotate). The transmission ratios observed from this viewpoint are called the stationary transmission ratios.

More Nomenclatura: Superscript x^y denotes rotational speed of shaft x when observed while sitting on shaft y. (This will be an actual superscript as soon as I have found a volunteer who'll edit my blog.)

Formula of translation: z^y = z^x - y^x
Let me explain this formula with a picture: imagine X sits on the curb of a street, y sits on the shoulder of somebody who's walking by towards North, and z sits on the shoulder of a cyclist, also going North. From y's point of view, x is moving southwards and z is moving northwards (assumed it's faster than y) with a speed just slower than seen from x.
As a corollary y^y = y^x - y^x = 0.

Let's apply the formulae: in the stationary case, we observe every velocity from the planet carrier, thus all velocity variables get superscripted with c. The sun gear engages with the planets, thus: s^c×S = p^c×P. And the ring gear engages with the planets, thus -r^c×R = p^c×P. Since we are not interested in the rotational speeds of the planets themselves, we can fuse the two equations to get s^c×S = -r^c×R. Additionally we know c^c = 0.

Now let's look at the case of a fixed sun gear. We want to translate all values x from x^c to x^s, thus we apply x^s = x^c - s^c. Since ring gear and planet carrier are our in- and output, we want to derive the ratio r^s/c^s which equals (r^c - s^c)/(c^c - s^c).
Now we fill in what we know from the stationary case, namely c^c = 0 and r^c = - s^c × S/R.
Thus r^s/c^s = (- s^c × S/R - s^c) / ( - s^c ) = S/R + 1.

I hope that even if you got lost a little in the middle, you'll appreciate the simplicity of the result gear_ratio = r^s/c^s = S/R + 1 which we derived from the simple axioms y×Y = z×Z and z^y = z^x - y^x.

Taking the coarse bounds 0 < S < R, we find that we can use this simple planetary layout to get a ratio 1 < δ(r, c) < 2, that is at most double or half the speed. (How close we can get to 1, that is, what the smallest possible gear step is, depends on some further mechanical parameters.) In the next post we will see, how different usages of this simple gear can be used to build a two-speed gearing (as does the Schlumpf speed-drive) and even a three-speed gearing (as do the three-speed hubs from F&S and Sturmey Archer invented a hundred years ago).


Now the case of a fixed ring gear
s^r = s^c - r^c = s^c + s^c*S/R
c^r = 0 - r^c = + s^c*S/R

δ(s, c) = s^r / c^r = (1 + S/R) / S/R = R/S + 1
rough bounds 0 < S < R
so 2 < δ(s, c) < ∞

Now it is theoretically interesting that we can make gears with ratios from 1 to 2 and from 2 to ∞ and thereby cover the entire possible range (with a small gap at 2, meaning we can't have a transmission ratio of exactly or close to 2).

A ratio of more than double is usually impractical for a single gear step, but this arrangement can be used well in combination with the other one. A simple example is Schlumpf's Mountain Drive which is designed to work in combination with a rear derailer. Since the planetary gear's ratio is so big, the arrangement will spread the available gears further out and avoid gear overlap, that is, more effective gears with less logical gears to shift. We will later see, how two planetary stages can be combined to create a staged gear arrangements whose gears can be shifted in a single sequence with a single shifter and no overlap.


Here are some interesting things to cover in the future:
 - How are multiple gears actually switched?
 - How do the traditional 3, 5, and 7 gear hubs work?
 - How do the newer 4, 8, 11, and 14 gear hubs work?
 - What other improvements can be made to a simple gear box: shifting under load, saving weight, increasing reliability, and much more!

21 December 2010

Google-Karte mit Bauprojekten des Schöneberger Grünzuges


Die Rote Insel wird grün auf einer größeren Karte anzeigen


Gelb = neue Straße
Blau = existierende Radrouten
Rot = Projekte im Bau oder geplant
Grün = Rad-/Skate-Route im Bau (Südteil) bzw. geplant (Nordteil)

13 October 2010

Special parts and real geeks

Carly, Speedy, and Satomi
Since I acquired my new bike Carly from California, whom you can see in the foreground of this picture, I am thinking about fitting a dynamo to equip her with some fine electric lights. It seemed that in the 74mm fork domain, there's only the choice between the very expensive SON XS (200€) and the half-baked, still not cheap Dahon Joule, which for a price of 100€ only delivers power for a front light, not the rear. Although the difference is only 2.4W vs 3W in power, I think that having a rear light on the Joule will reduce the voltage which might yield bad results especially at lower speeds.

Flevo durch zwei (Tag)

Because I didn't like the price / performance ratio of either hub dynamo, I decided to go with a spoke dynamo as I have it on Knicki (the black thing you see on the right wheel on the second picture). But as I went to Berlin's recumbent geek meeting this week, I was told of a third manufacturer of small hub dynamos: the big Shimano itself! I don't know since when they're offering it, but as of now, the only official information I found about it was in Dutch language! If you switch the language to English on that page, the hub dynamo disappears!

There seem to be several versions of that dynamo which is part of Shimano's Capreo series (the one that also has the famous 9 tooth sprocket). There are versions with 2.4W (boo!) and the real 3W. With 28 spoke-holes and with 24. I just read on bromptonauten.de that there is a special Brompton version of that dynamo since 2009. This dynamo now is standard on the Brompton and finally replaces the old bottle dynamo, yay! It needs to be special because the Brompton has a narrower axle and very narrow nuts, no space for a quick release. The Bromptonauts have two forum threads (in German) dedicated to the topic. Someone said that the original Capreo dynamo was made for Dahon, but since Dahon only uses their own Joule dynamo on their bikes, I suppose that Dahon Joule is actually made by Shimano and the 3W version is a spin off from that product.

I still don't know how many versions of Capreo exist by now, but incidentally one of the few Google hits on the topic was a dealer in Berlin! So I will take little Carly for a ride to that shop and see if they have a model that fits. Maybe they even have a nice rim and spokes, so I can make a nice wheel.

28 June 2010

My Berlin commute

My new work and my current temporary home are on the same street - only 13 km apart. The street changes names a couple times as it traverses severals boroughs of Berlin, but it's really a straight ride, mostly with good bike lanes on the street or sidewalk. Despite being totally inside the city, the density of traffic lights on this road is rather low and so I travel much faster on my bike than I would in Toronto. It's also totally flat!

Yesterday, I even found a nicer route that uses quieter streets:

View Larger Map

Moving to Berlin is a real improvement in terms of quality of life! And the route to the sailing club is even better, half of it leading right through the Grunewald forest.

29 March 2010

the better bike odometer, part II

While my original idea in making up the bike electro-mechanic odometer described in the last past was to get rid of batteries on a bike, a friend told me that for ordinary people getting rid of the spoke sensor of the classical odometer is a much better selling point for the hub-dynamo driven odometer. Batteries in bike odometers usually last several years, so there is little pragmatic need to rid of them. I also agree with him that most people will probably prefer a digital odometer (much resembling the ones on the market now) to a mechanical one. While I still think that an electro-mechanic odometer would be a nice luxury bike component (just like Swiss mechanical watches are still a popular accessory among the rich elite), a more traditional digital odometer would be much easier (and cheaper) to make and could offer the features at the same price as state-of-the-art current odometer – just that it dispenses with the spoke-sensor and batteries.

My friend and I have come up with two ways to make a sensor-less and battery-less odometer: first is to use off-the-shelf generic components like a dot-matrix LCD and micro-controller – this allows us to build an experimental prototype at low cost as well as some practical devices for our own bike at an affordable price. We agreed to build this together just for fun!

If we ever were to commercialize it, however, we would need to drop to price to the same €20 range as current commercial models which requires custom-made components that are mass-produced with high initial investment cost. Personally I think there could be a middle way by re-using the shell and LCD of a cheap generic odometer and just replace the electronics with ours. In Europe (at least Denmark, Netherlands, Germany, Austria, and Switzerland) hub dynamos are now common place on utilitarian and travel bicycles and even on some sport bicycles. (That's because dynamo-lights are legally mandated for bikes used in public traffic and hub dynamos have replaced all other dynamos on new bikes.) Therefore the market for a spoke-sensor-free and battery-free bike odometer is huge. There are currently ca. 5 million new bikes sold in Germany each year and the amount is probably the same in the sum of the other four countries mentioned. If half of those bikes has a hub dynamo then that's 5 million potential odometer-buyers each year just in those five countries!

21 March 2010

a reliable and sleek bicycle odometer


Knowing how far you've gone is very useful when cycling. It can help you find your way with the help of a map (for ex. to “turn right after 1.5 km”), find which of a set of alternative routes is shorter, know how much workout you had, and estimate how far you still have to go on your trip. A classical odometer offers two counters, one resettable “trip” counter and one non-resettable “lifetime” counter, both having their own scale. The odometer proposed here shows just those two counters in the form of black digits printed on a white background, the digits sliding behind a little window. This has the advantage of being very readable, high-contrast, good-looking, robust and not using any power to display the numbers. The counting up is done using impulses from the bicycles hub dynamo and uses almost no power from the wheels. Resetting the trip counter is done mechanically with the user's gesture being the power-source. This construction ensures that the counter always displays the current mileage and is resettable even when the bike is not running or has not been running for a long time.

Here are some advantages of the proposed odometer:
  • high readability, always-on display
  • ease of use with only one dial (or button) to reset the counter
  • no parts attached to the bike wheels; only a small cable branching of the lighting system
  • no battery needed, therefore no need to swap batteries
  • very little energy use which does not noticeably increase the loss power of a normal hub dynamo
  • handle-bar mounting in-between brake lever and grips for sleek design, robustness, and discouraging theft

Here's a very sketchy drawing of how the odometer integrates with the handlebars. The top line shows XXX.X km and the bottom XX XX0 km.


And here some more detailed design information: the trip counter has four digits, the smallest counting 100 m. The life-time counter also has four digits with the smallest counting each 10 km. The longest trip will therefore be 999.9 km, which has been chosen because some people ride more than 100 km in a day and other might want to count trips of more than a day. The life-time counter will relapse to 0 after showing 99'990 km which is enough for most bicycles, although not enough for people who really ride a lot and keep the bike for more than a decade. (For an example see Rohloff Wanted day.) For those people there will be a luxury version of the counter with two times five digits: the trip counter measures each 10 m and the life-time counter goes up to 999'990 km. I would think that some people would buy this extended counter just to show off how far their bike is designed to go!

The two photos above show historic counters with little disks carrying the digits. To make the counter slimmer to integrate it better with the handlebars, the disks can be replaced by a little strip that turns around two pins as shown in the pseudo model on the right. Designing the electronics for this device will not be totally trivial because it has to deal with a wide variety of currents and voltages coming from the dynamo at different speeds and with lights on or off. There will several hidden digits to account for fractions of the distance displayed. Alternatively those values could be stored in some digital solid-state memory of a couple bits. In any case, storing this information won't use any power. The only power supply will be to increase the invisible counter which at every full interval will increase the visible counter. I wish I knew somebody who could figure those electronics out for me!

A variant with speedometer would use a classical needle to show the bike's current speed on a scale and it would additionally have a counter for the time of the current trip (accumulated time with speed >0). Then a second needle would show the average speed of the trip (which is the dividend of trip length and trip time so far). This second needle would be held in place with a gearing mechanism that doesn't need any power either. So when you stop the bike, the current speed will drop to 0 and stay there while the average will just stay where it was. When you sleep during a cold night that would drain any batteries and come back the next morning, the needle will still show your trip's average speed. I think that's reliability! And that's cool!

PS: Germersheim, I come!

25 February 2010

neuer Kettenschutz für Speedy


Speedy 2006 in Berlin
Nachdem mir mein Chainglider im letzten September abgefallen ist (genauer gesagt: er kam ein paar Mal zwischen Kette und Blatt und beim letzten Mal war er dann zerstört), suche ich jetzt nach einem neuen Kettenschutz. Den Chainglider würde ich gern wieder nehmen (und zwar mit einem zusätzlichen Clip, der das in-die-Kette-kommen verhindert; diese ist bei einigen Herstellern, z.B. Fahrradmanufaktur, sowieso schon Standard), allerdings möchte ich auch eine andere Blatt-/Ritzel-Kombination.
Der Grund ist ganz einfach: mein aktuelles Ritzel ist mit 14 Zähnen für die Shimano-Nexus-Schaltung eine Sonderanfertigung und sehr schwer zu ersetzen. Außerdem ist es durch meine erste, damals sehr gelängte Kette schon total verschlissen. Ich möchte jetzt hinten ein größeres Ritzel. Erstens, weil es einfach zu beschaffen ist und zweitens, weil bei so wenigen Zähnen jeder Zahn mehr den Verschleiß ei wenig verringert. (Zugegeben, hauptsächlich muss ich besser reinigen und nicht beim Reifenwechsel einen Haufen Sand ins innere des Chainglider schaufeln. Andere Leute haben wesentlich längere Kettenlebensdauern mit ihrem Chainglider erzielt, also warum sollte ich's nicht auch schaffen!?)
Übrigens noch zum Thema Chainglider und zwischen die Zähne kommen: ein Video von Hebie zeigt wie die neueste Variante durch einfache Klick-Verschlüsse noch besser hält. (Falls der Video-Link nicht funktioniert, hier Hebie's Webseite zum Chainglider.)

Jedenfalls soll es nun ein 15er oder 16er Ritzel für mich sein und ich bräuchte dann ein 45er oder 48er Kettenblatt, um dieselbe Übersetzung zu erreichen. Ich würde mich aber auch nicht scheuen, die Übersetzung etwas länger zu machen, etwa 46/15 oder 50/16. Den Chainglider gibt es jetzt auch in einer Variante für 44er Blätter, so dass ich 44/15 fahren könnte. Da dies aber etwas kürzer wäre als mein Status Quo, suche ich jetzt also nach Alternativen zum Chainglider. Die inoffizielle Aussage von Hebie, dass man auch über Chainglider für Falträder nachdenkt, hat für mich keinen Nutzen, da es ja dieses Jahr nun nichts mehr damit wird.

Dahons “biologic freedrive” (yeah!) am 2010 Mµ Uno
Bei Dahon hat man sich zur gleichen Zeit, nämlich neu für diese Saison, eine eigene Lösung entwickelt. Witzigerweise hatte ich gerade kurz vorher über die Zeitschrift Fahrradzukunft von diesem System erfahren. 
Problem des Chainrunners ist allerdings, dass er mindestens ein 17er Ritzel braucht. Das könnte ich zwar theoretisch anbauen, aber mein Kettenblatt wäre dann mit 51 oder mehr Zähnen recht groß. (Obwohl – Brompton hat ja auch 52 Zähne an einem noch viel kleineren Fahrrad.)
Dahon's Mµ Uno kombiniert das System allerdings auch mit einem 16er Ritzel!
Zugegeben: in der 52/17 Variante wäre die Übersetzung etwas länger als jetzt und damit besser als 44/15 mit Hebie. Dazu kommt noch, dass Hebie kein offizielles 15er Endstück für Shimano hat, sondern dieses durch Zurechtschneiden eines speedhub-Endstückes erzeugt werden muss.

In Toronto habe ich letzten Herbst schon ein Fahrrad gesehen, an das jemand selbst ein Wellrohr gebaut hatte. Scheinbar sprechen sich unter Fahrrad-Bastlern manche Ideen noch schneller herum, als sie im Internet zu finden sind! Leider war ich nicht schnell genug, gleich nach Herkunft der Idee und genauen Parametern des Rohrs zu fragen. :-( Mein Vater sagt nämlich, dass die normalen Baumarkt-Wellrohre (Leerrohe zum Verlegen von Kabeln unter Putz usw.) bei Außentemperaturen zu schnell spröde werden und kaputt gehen.

Es sieht also wirklich danach aus, als ob dieses „Wellrohr aus dem Roboterbau“ die beste Lösung für mich wäre. Und nachdem der Chainglider nach mehr als 5 Jahren am Markt schon Standard bei Komfort- und einigen Reiserädern wurde, hätte ich dann auch wieder etwas besonderes: dem Trend um ein paar Jahre voraus. 

22 July 2009

new cycling route to the sailing club

I found my favorite cycling route down Beverly Street and along Front St. and Queen's Quay to the sailing club because I once wanted to take a friend and was looking for a calm route specifically for her. It happened to be that this route was also well-paved so I stuck with it and took it every time.
Now, last week I took another friend and found a new route which I like a lot and which is now my preferred alternative to avoid cycling boredom.


View Larger Map

The good think about this route is that all the uphill happens on quite, well-paved residential streets. As a side benefit, most of the isopleth is on Wellesley Street. Not that I care much about bike lanes but at least drivers will not be surprised about bicycles there. :-D

PS: Google's blue line ends at Harthouse Circle because Google doesn't know that you can bike through there to reach Hosking Ave / Harbord St.

4 June 2009

Antwort von Hebie

Vor kurzem habe ich der Firma Hebie geschrieben, ob sie nicht wohl einmal eine Version ihres wunderbaren Chaingliders für Falträder anbieten will. Hier die sehr schöne Antwort:


Sehr geehrter Herr Will,

Ihre Nachricht hat uns sehr erfreut und die Runde im Haus gemacht.

Faltrad und CHAINGLIDER passen in der Tat perfekt zusammen. Leider zieren sich die Faltradhersteller noch etwas. Ihre Mail kam jedoch zur richtigen Zeit zu uns, da wir momentan eine diesbezügliche Investitionsentscheidung treffen müssen. Sie stützt das Vorhaben, das dennoch nicht ganz einfach ist wegen hoher Investitionskosten und Unsicherheiten seitens der Hersteller.

Vielen Dank auch für die mitgesandten Daten, die sich mit den unseren großenteils decken. Allerdings falten die meisten Räder in Europa wohl über die Kette.


Mit freundlichen Grüßen!
Met vriendelijke groet!
Best wishes!
Med venlig hilsen!

Dominik Peitsch
Marketing-Mix


HEBIE GmbH & Co. KG

Sandhagen 16
33617 Bielefeld
Amtsgericht Bielefeld, HRA 8234
Geschäftsführer:  Dirk Niermann

Und hier meine ursprüngliche Nachricht:

Sehr geehrter Hersteller excellenter Fahrrad-Komponenten!

Ich bin seit drei Jahren zufriedener (und zuweilen geradeheraus begeisterter) Nutzer des Hebie Chaingliders. Die Begeisterung hat auf einige Familienmitglieder umgeschlagen, die jetzt auch ihr Fahrrad umgerüstet haben, bzw. gleich ein mit Chainglider entworfenes Rad gekauft haben.

Zu gern würde ich einen Chainglider auch an meinem Faltrad einsetzen! Neben dem Schutz der Hose und Schutz der Kette bietet sich am Faltrad noch ein weiterer, entscheidender Vorteil: wenn das Rad gefaltet ist, muss man immer aufpassen, wo und wie man es anfasst, und wo und wie man es abstellt, damit man sich nicht selbst die Hände oder womöglich noch anderen Menschen die Hosen, Kofferräume, oder Gardinen mit Kettenfett verziert.

Die meisten Falträder haben ein festes Rahmendreieck hinten, welches die Kette beim Falten in Form belässt, so dass man den Chainglider genauso aufziehen kann, wie bei einem großen Fahrrad. Der vordere Teil des Chaingliders passt sogar schon auf mein Faltrad! Problem ist nur, dass ein Faltrad wegen der kleineren Räder auch ein kleineres Kettenritzel verwendet (angenommen hier, das vordere Kettenblatt ist nicht größer als normal). Persönlich habe ich ein 14er Ritzel an meinem Fahrrad. Die 3-Gang-Modelle von Dahon haben alle ein 13er Ritzel. Die mit Inter-8 Schaltung ein 16er. Daraus ergibt sich der Vorschlag, ein Chainglider Hinterteil für Ritzel von 13 bis 16 Zähnen zu entwickeln und verkaufen.
Den Faltradmarkt würde dies revolutionieren, weil die verschmutze Hand/Gardine/Kofferraum damit endlich der Vergangenheit angehören würde! Allein Dahon hat in der ersten Jahreshälfte 2007 über 180'000 Fahrräder verkauft und mindestens 20% davon sind mit Nabenschaltung ausgerüstet. Der Markt für Falträder wächst schneller als der für Fahrräder allgemein!
Überlegen Sie sich mal, in diesen Zukunftsmarkt einzusteigen -- ich wäre Ihr erster Kunde!
beste Grüße,
Robert Will

20 May 2009

Ergonomic Revolutions

Six meters per pedal-turn. This is the gearing-specification which I would use to design a single gear bike. Building this today is a piece of cake that only requires basic skills of multiplication and division. Let your wheel be of the twenty inch diameter class, which yields (depending on the tire) about 1.6m in circumference. Add a chainwheel with 52 teeth and a 14 teeth sprocket and there you go: 5.96m of forward motion per one pedal turn! (If you think small is beautiful, go with a 42/11 combination at 6.13m of forward motion per pedal turn.)
And all this is made possible by John Starley's 1885 invention of the bicycle chain! Before the chain drive was invented you would need an almost two meter high wheel to mount a pair of pedals on, so that you move your six meters per revolution. But sitting on such a wheel you wouldn't reach the pedals anymore since they are over one meter away from the seat!
Most Hi-Bi's of Starley's time only had about 1.5m high wheels which was very dangerous for the riders sitting on top of them, but only delivered 4.7m per turn. Starley's "Safety Bicycle" with a chain drive was thus not only safer, but also more comfortable to ride! And, since the bike's engine is a human, being more ergonomic, also made it faster.

Fast forward 124 years. I am riding a twenty-inch bike with 8 internal gears. With a 42/14 tooth combination my neutral gear (which happens to be the fifth) takes me forward 4.85m on each turn of the pedals. If I would ever like to do a ride without shifting at all, my sixth gear gives me just about the perfect six meters of development (that's what we call the forward motion per one full pedal turn).

Interestingly, when I ride in the city, I am only using my gears number four to seven. That's four gears who have an overall transmission ratio of 167%. The surprise here is that this is just about the same ratio introduced by the three-speed gear hubs invented almost exactly one hundred years ago. Unlike modern bicycle buyers who just want the highest number of gears and the most sporty (or sexy) looking bike they can get, the inventors of one hundred years ago apparently thought very well about what was needed for best performance and just built that: Three gears, evenly spaced, 186% from lowest to highest. And those gear hubs were so well-built that many of them are still running Today. Especially in Toronto, you can see a lot of good, old bikes with those hubs on them.

Today, there are only a few people like my friend Kate, who actually know what they need and buy a brand new bike with just those three internal gears. Simple, reliable, ergonomic.

The revolution has happened a long time ago. Anybody joining in?

9 May 2009

bike sharing or bike scam?

Montreal is launching a public bike sharing system this coming Tuesday, and of course Toronto can't do other than imitate them. Toronto's system is planned to launch in 2010.
Montreal touts itself to have an advertising-free solution, but instead they have horribly high prices. They advertise the first 30 minutes to be free, but in fact, users have to pay five dollars subscription fee before they can even check out a bike. How is this tariff supposed to encourage the use of bicycles for very short distances and as a means to bridge the gaps between other means of transport? But that's always the problem with imitations: easy to copy the appearance, but still misses the point.

I wonder why the city blasts itself with fighting for clean air and community service, when in fact, the system is meant to pay for itself, the city doesn't spend a single cent on it! That's a really tough battle for the environment that you are fighting, guys! Private companies do everything for profit, why do we need a city government at all?! ((As a matter of fact, the city still provides the space to put the stations for I don't know what compensation... but still that can hardly be seen as a fight for clean air or commitment for citizen mobility.)

As an extra: This article on Spacing.ca talks about the funny coincidences that have led to the world-famed success of Paris' bike sharing system.